Pretty Pink Posh June 2019 Product Release Blog Hop

Good morning,
Welcome to Day 1 of Pretty Pink Posh June 2019 Product release Blog Hop! We are jam packed with whole bunch of Summer elements in this release. You could have a whole tropical scene on your card or project simply putting them together. I easily made 3 cards for the inspirations
<Card 1>

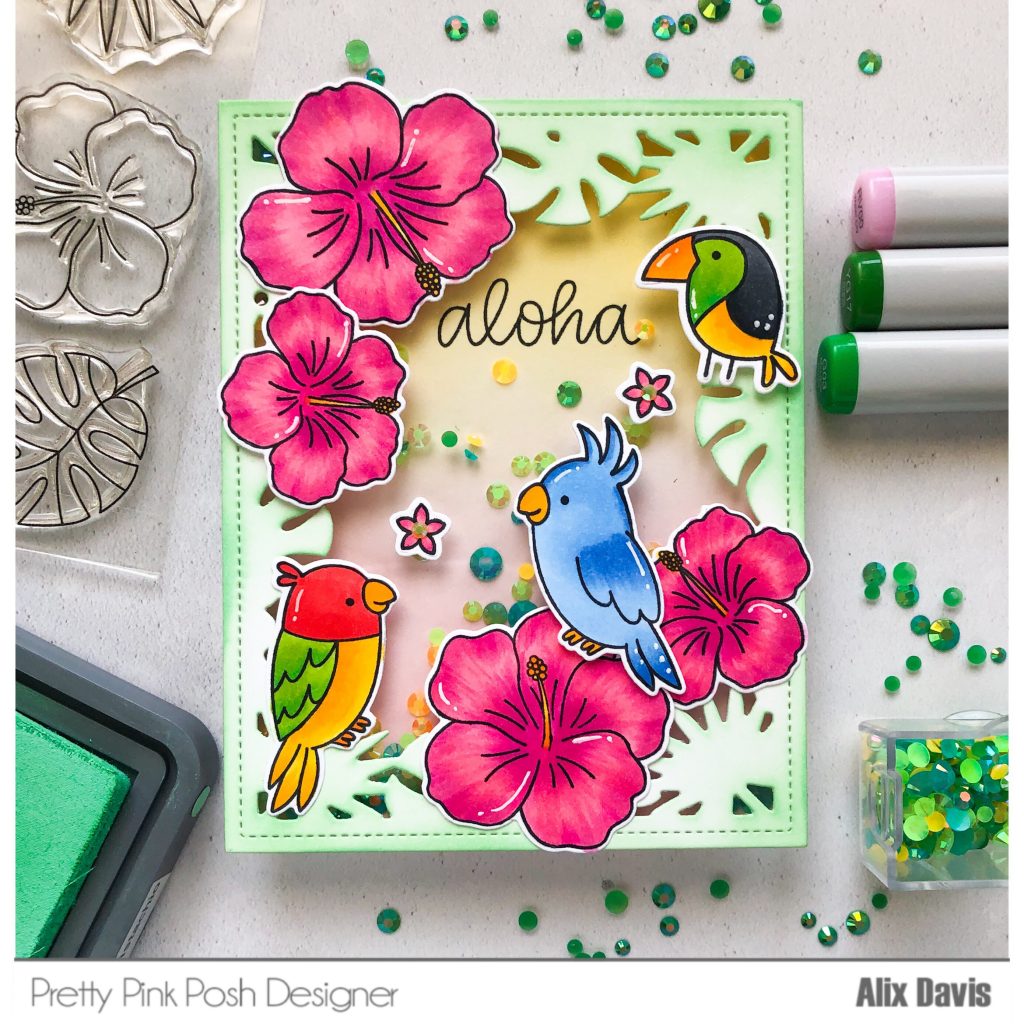
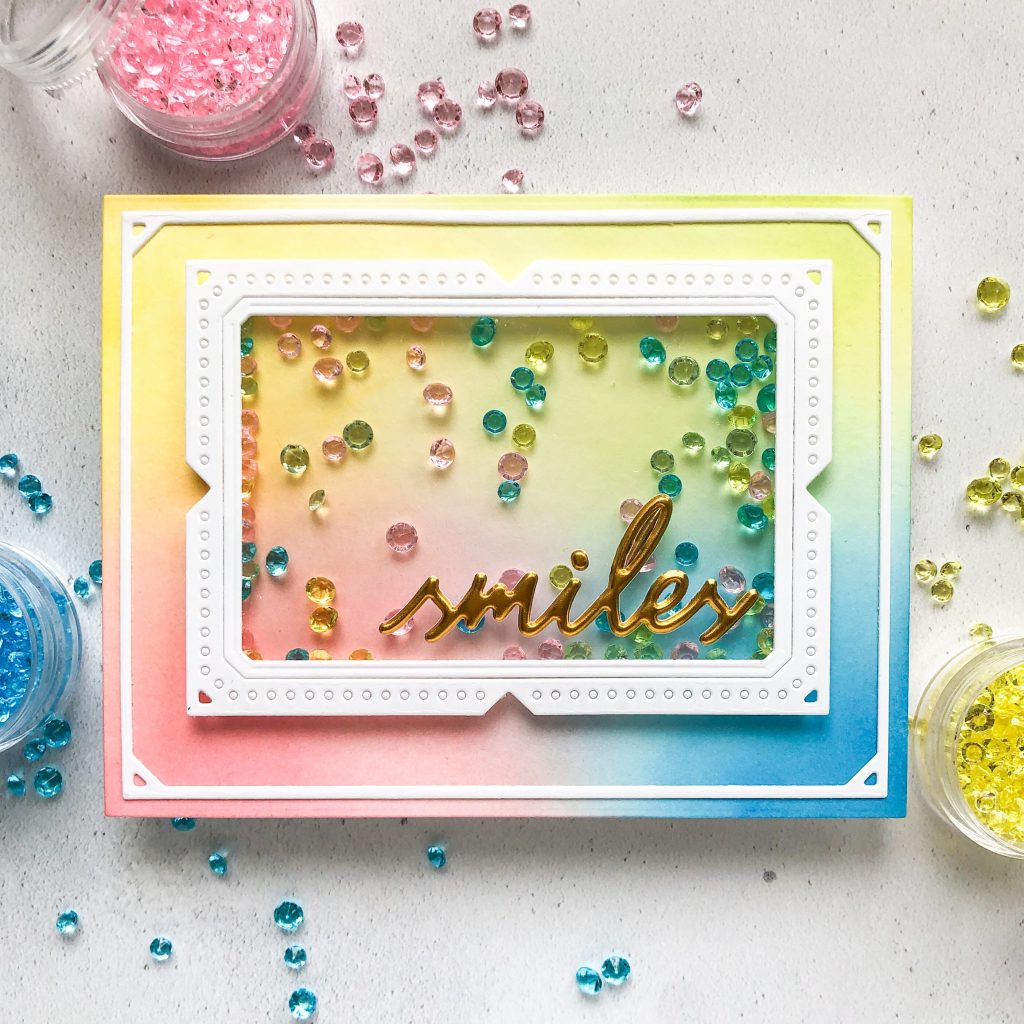
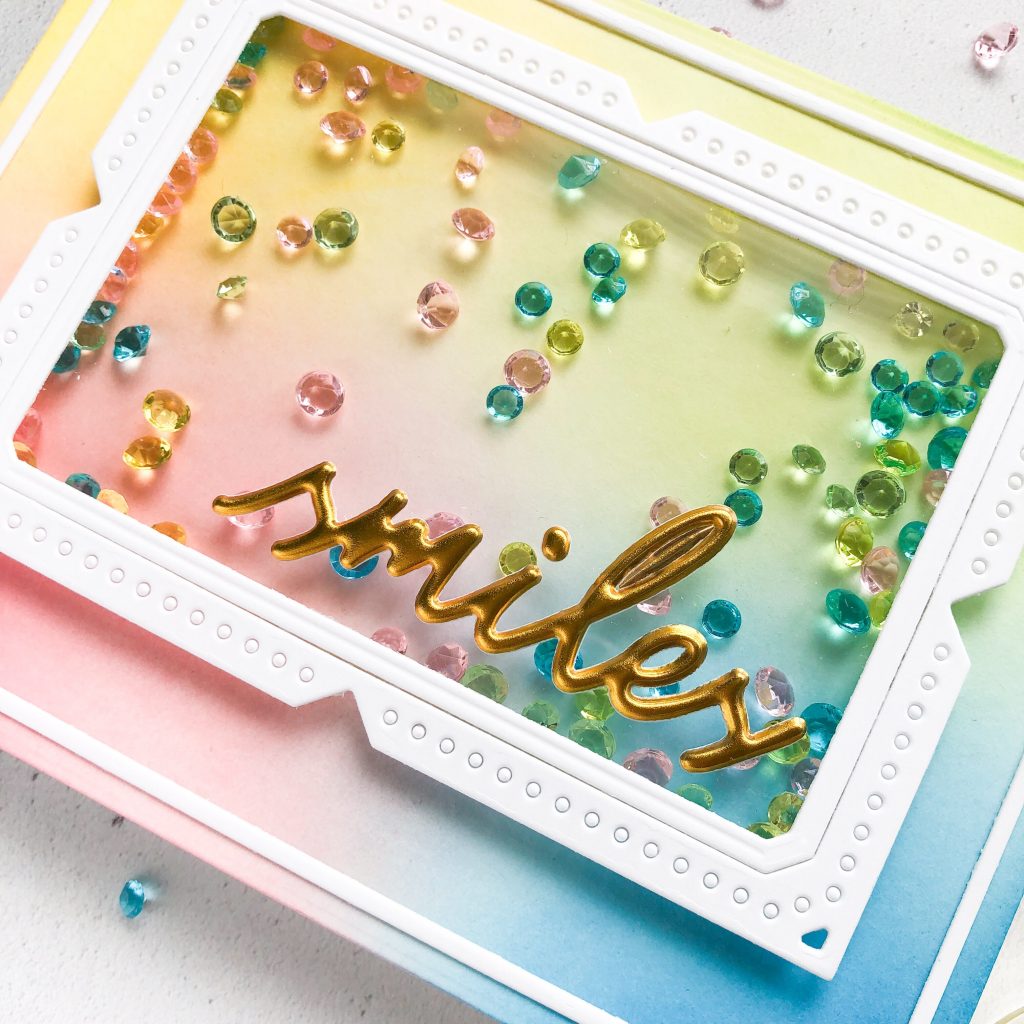
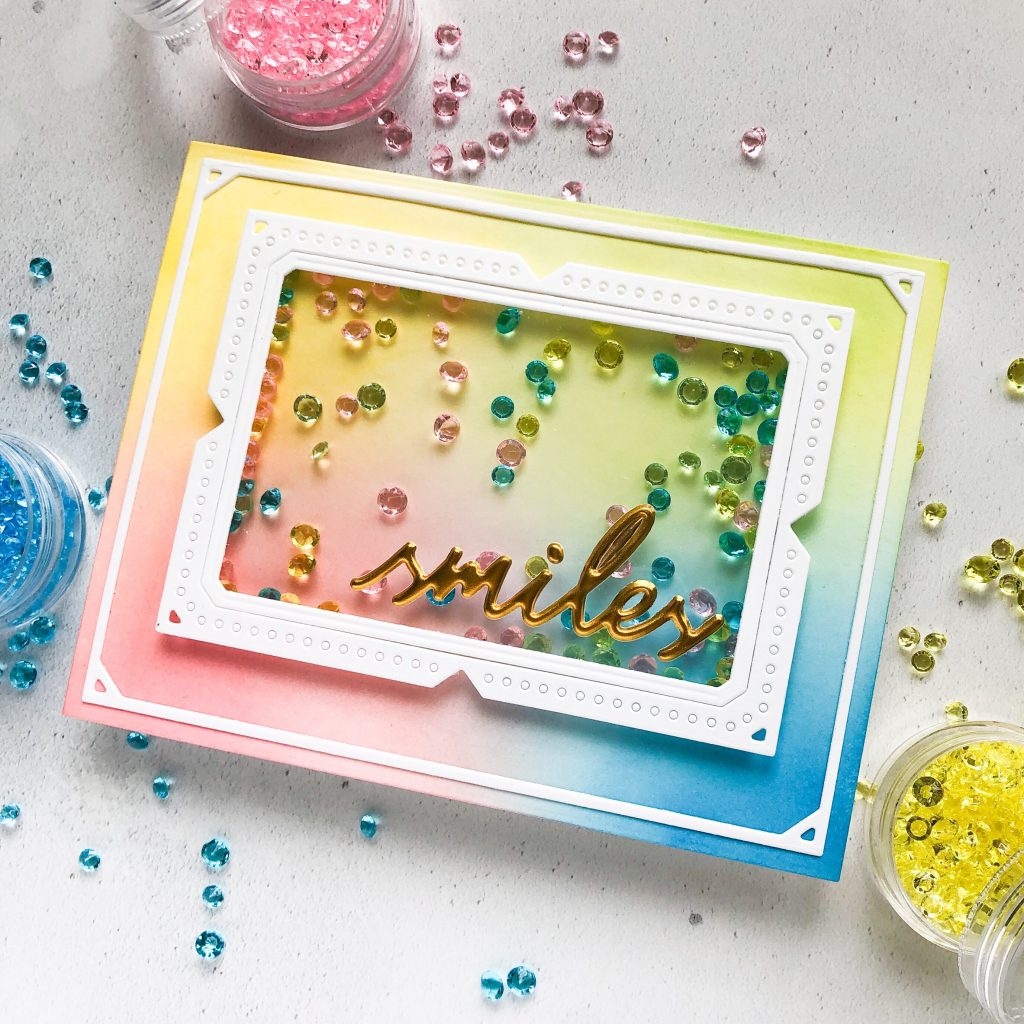
For my first card, I just wanted all. So I made a shaker card. I ink blended an A2 sized watercolor paper with Tim Holtz Distress oxide ink in Mustard Seed and Worn lipstick. Then I cut the front panel using Tropical Frame Die out a piece of white card stock paper and lightly ink blended with Tim Holtz Distress oxide ink in Cracked Pistachio. I stamped the sentiment “aloha” onto the background piece and poured a whole bunch of Citrus Jewel Mix, then I enclose this shaker window by adding a piece of acetate underneath the front panel and attached it onto the background piece with Foam tapes.

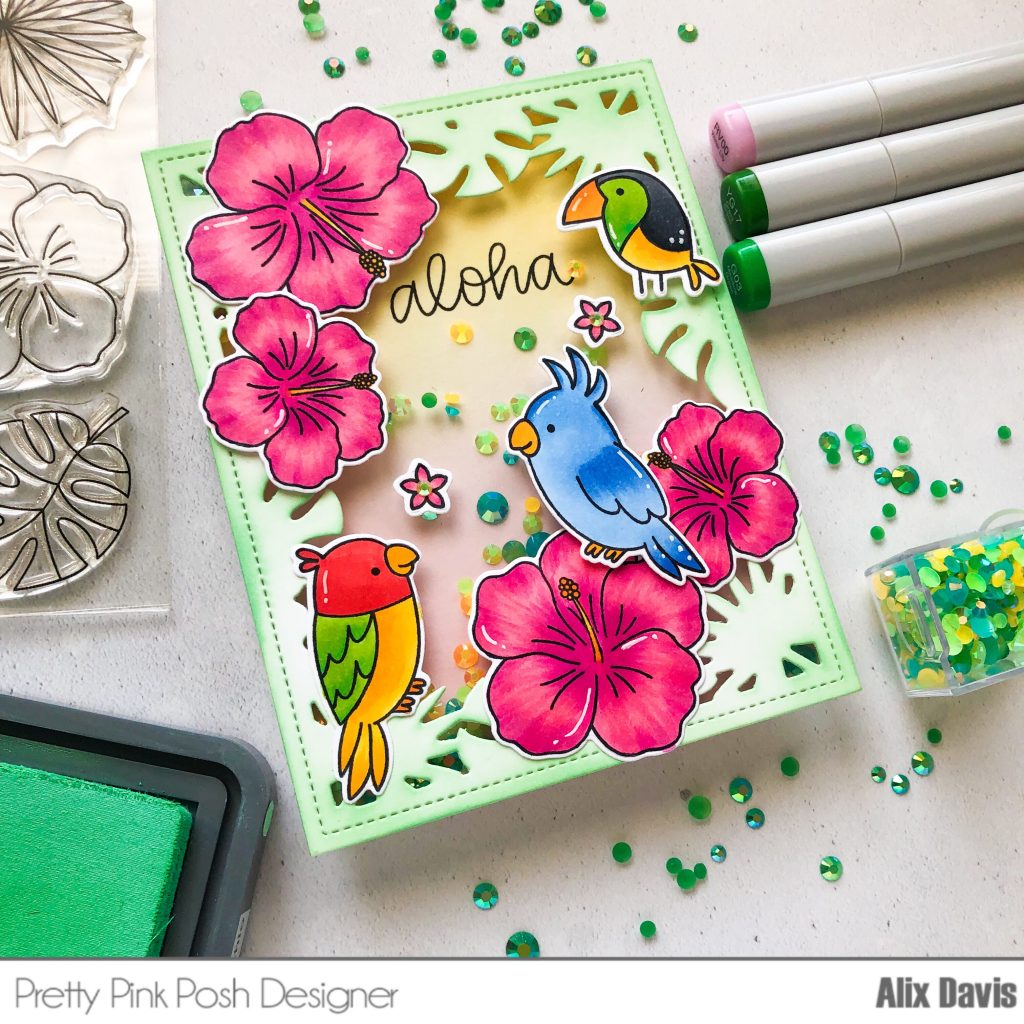
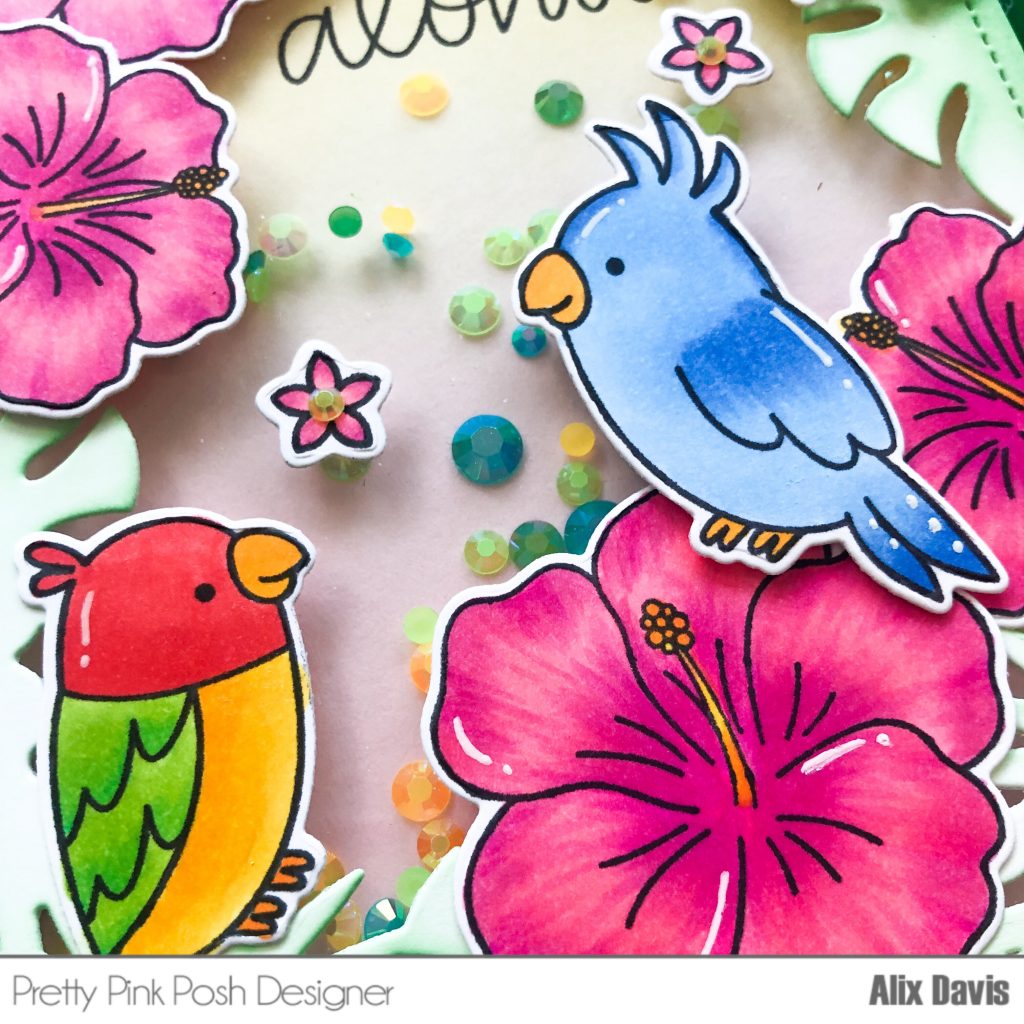
Then I stamped images from Hibiscus Flowers Stamp setTropical Birds Stamp set and Tropical Toucans Stamp set using Memento Tuxedo Black ink onto Neenah Solar White 80lbs card stock paper and die cut them with the Coordinating Dies (Hibiscus Flower / Tropical Birds / Tropical Toucans). I then colored them with my trusty Copic markers. I attached them onto the top of my card using Multi Medium Matte and Foam tape to finish this card.


<Card 2>

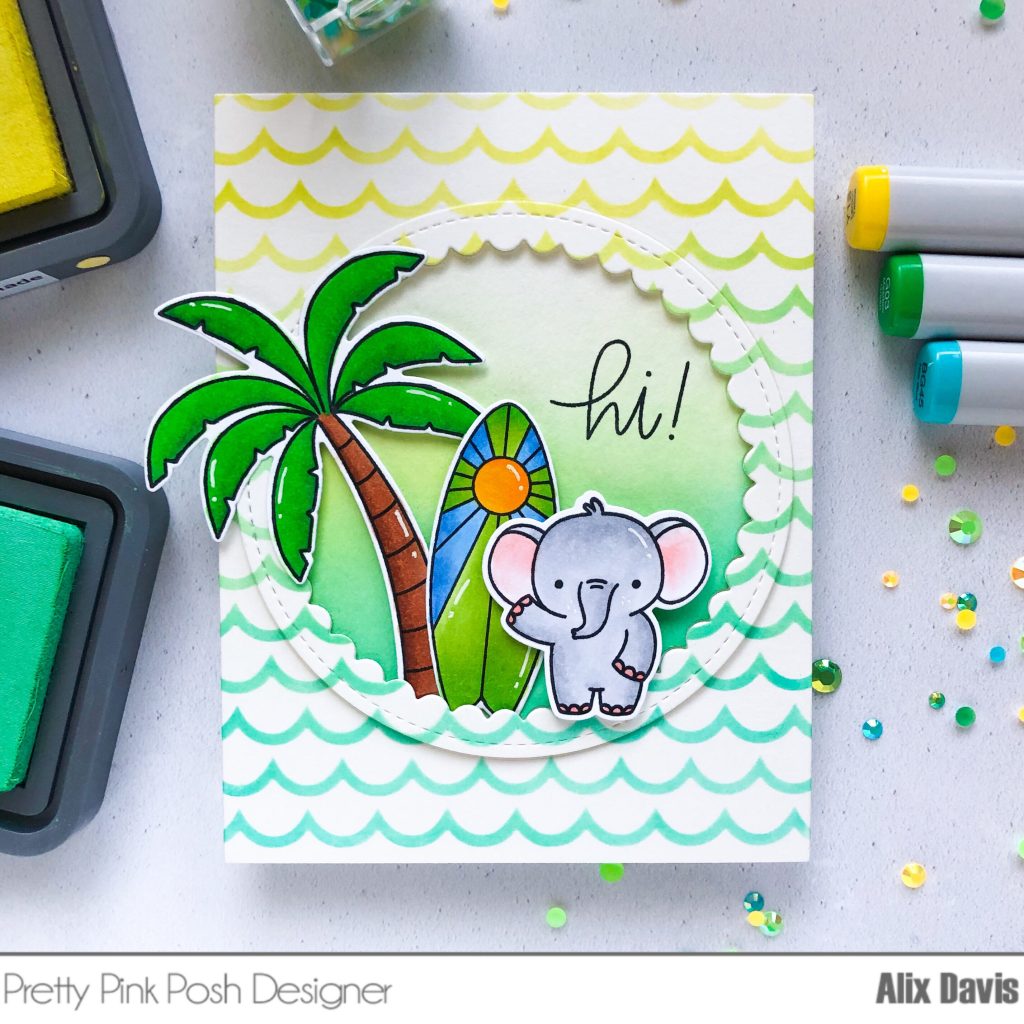
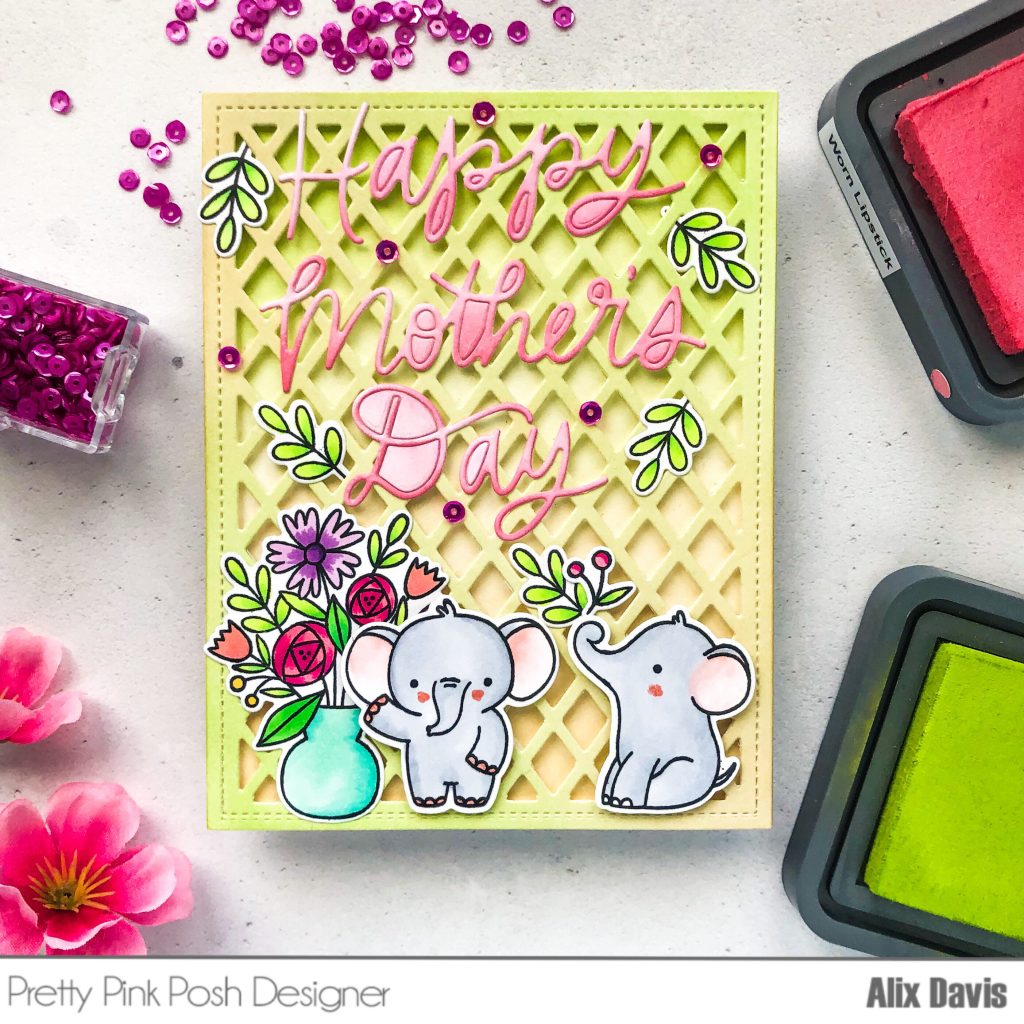
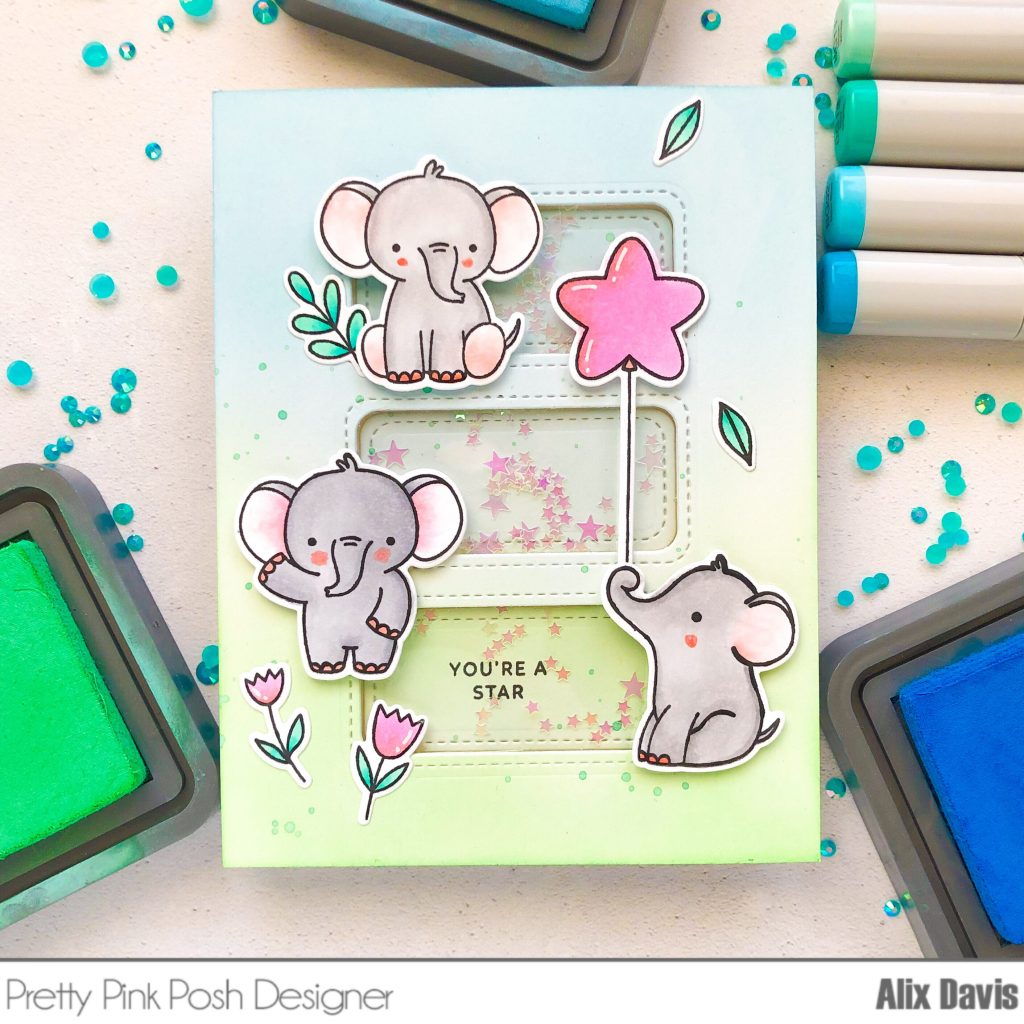
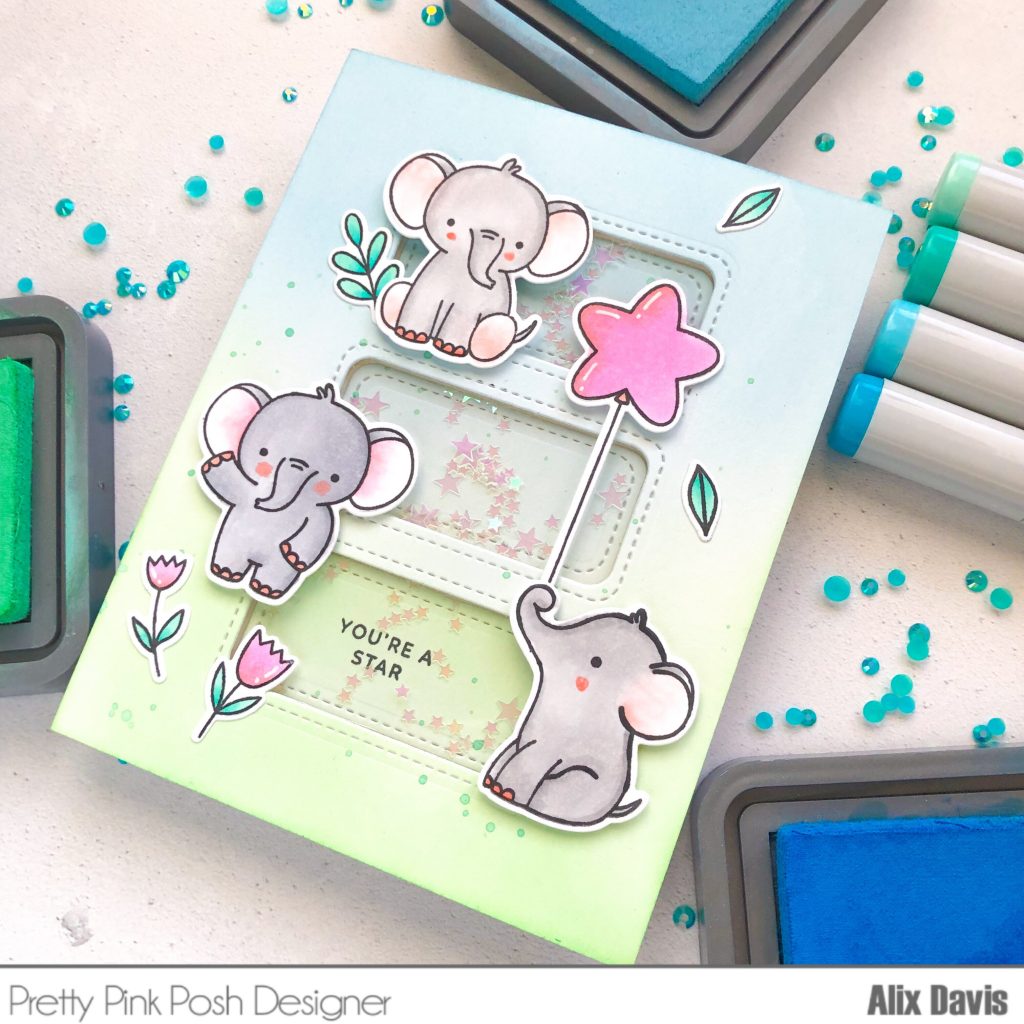
Who said elephant cannot surf? Everyone could do everything in our card world!For my second card, I used old and new products. I first stamped selected images from Summer Surf Boards Stamp set, Tropical Birds Stamp set and Elephant Friends Stamp set. After I colored them with Coipc markers, I die cut them with the Coordinating Dies (Summer Surf Boards / Tropical Birds / Elephant Friends).

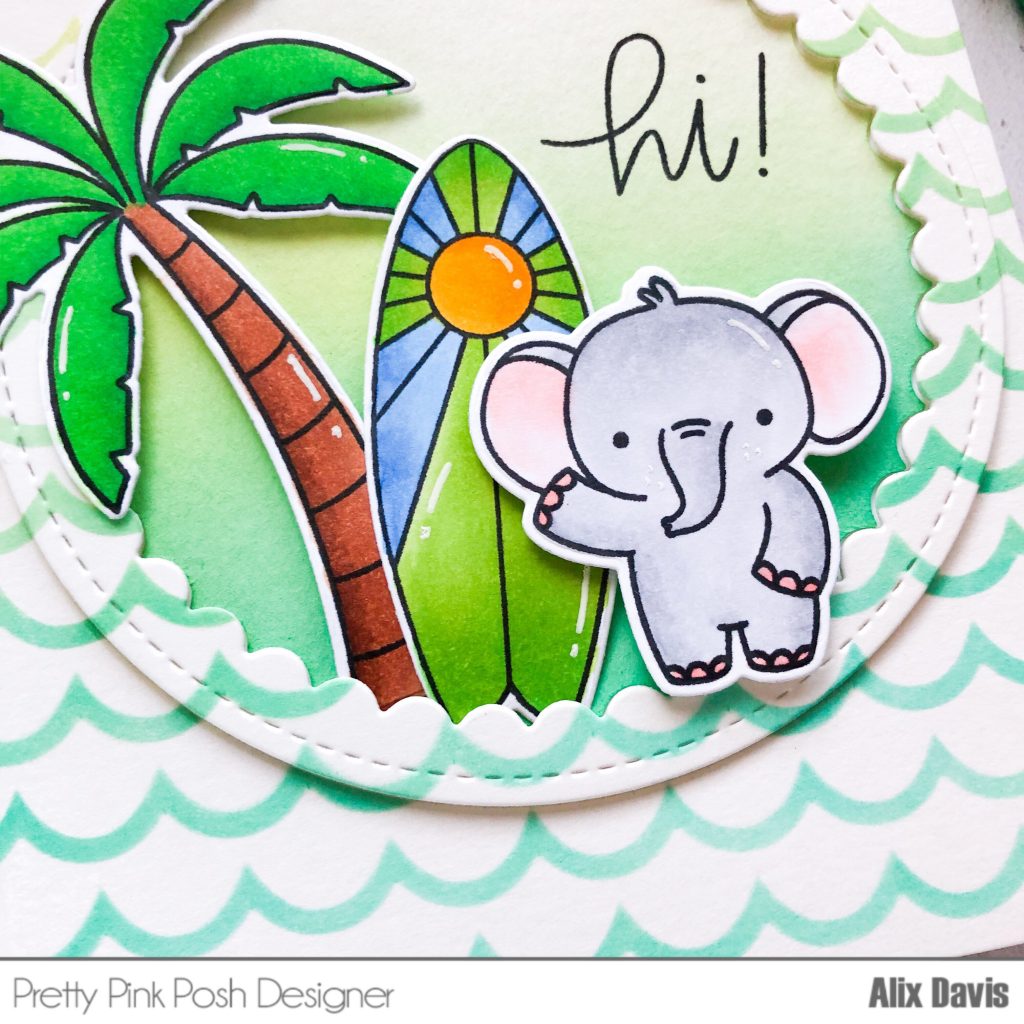
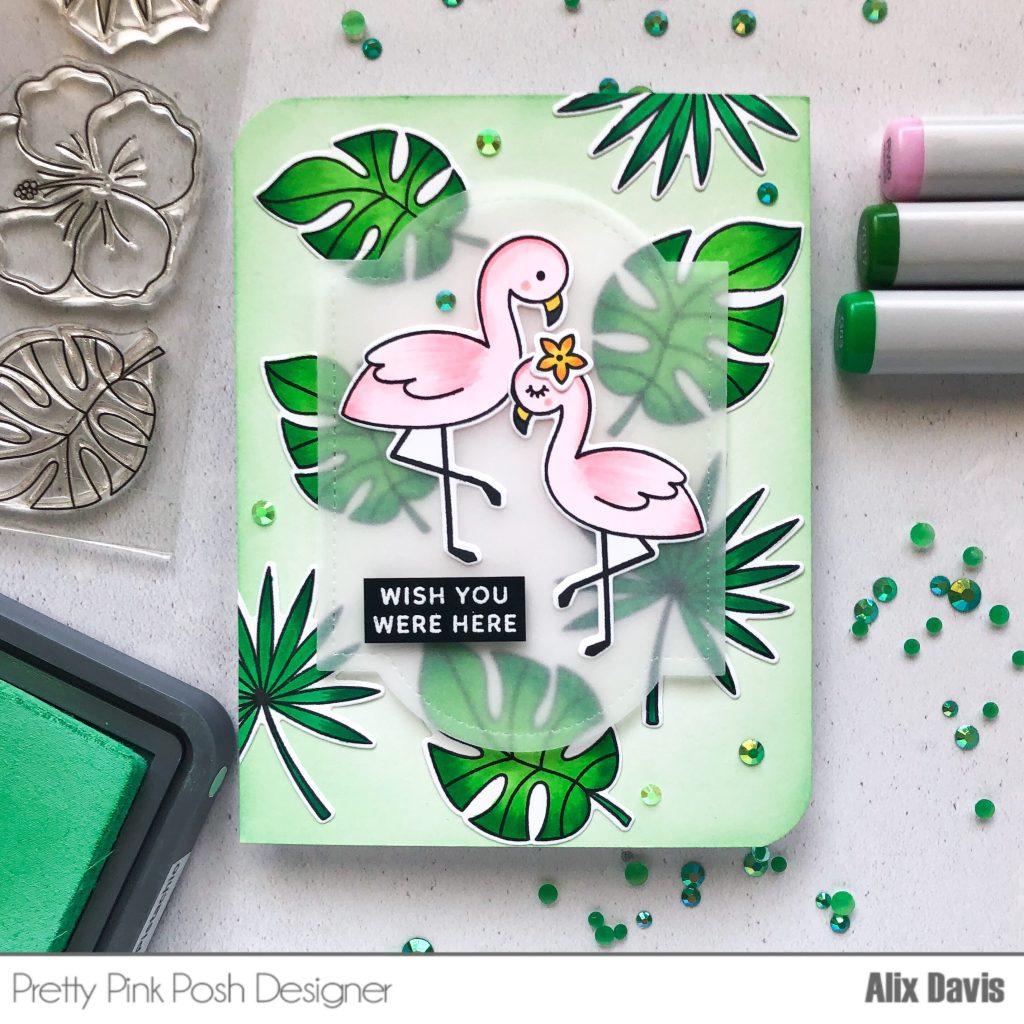
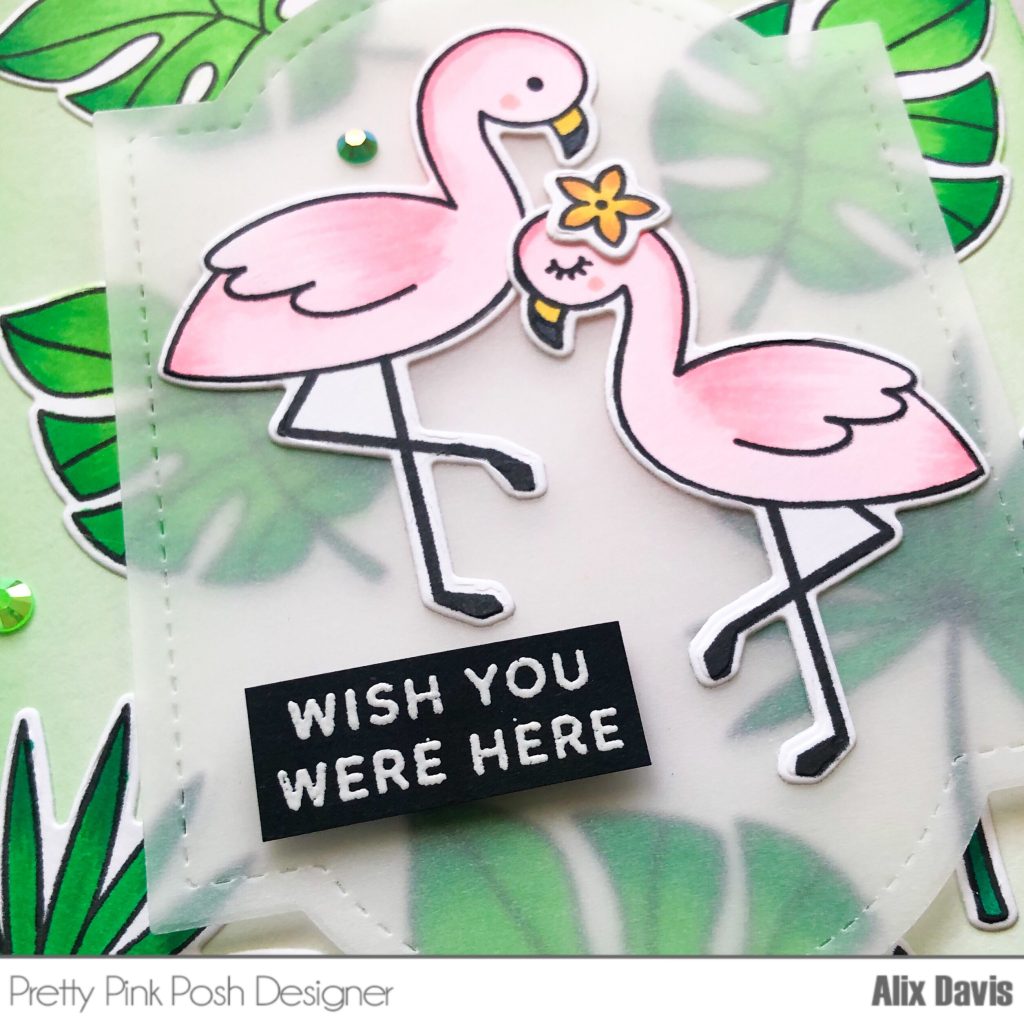
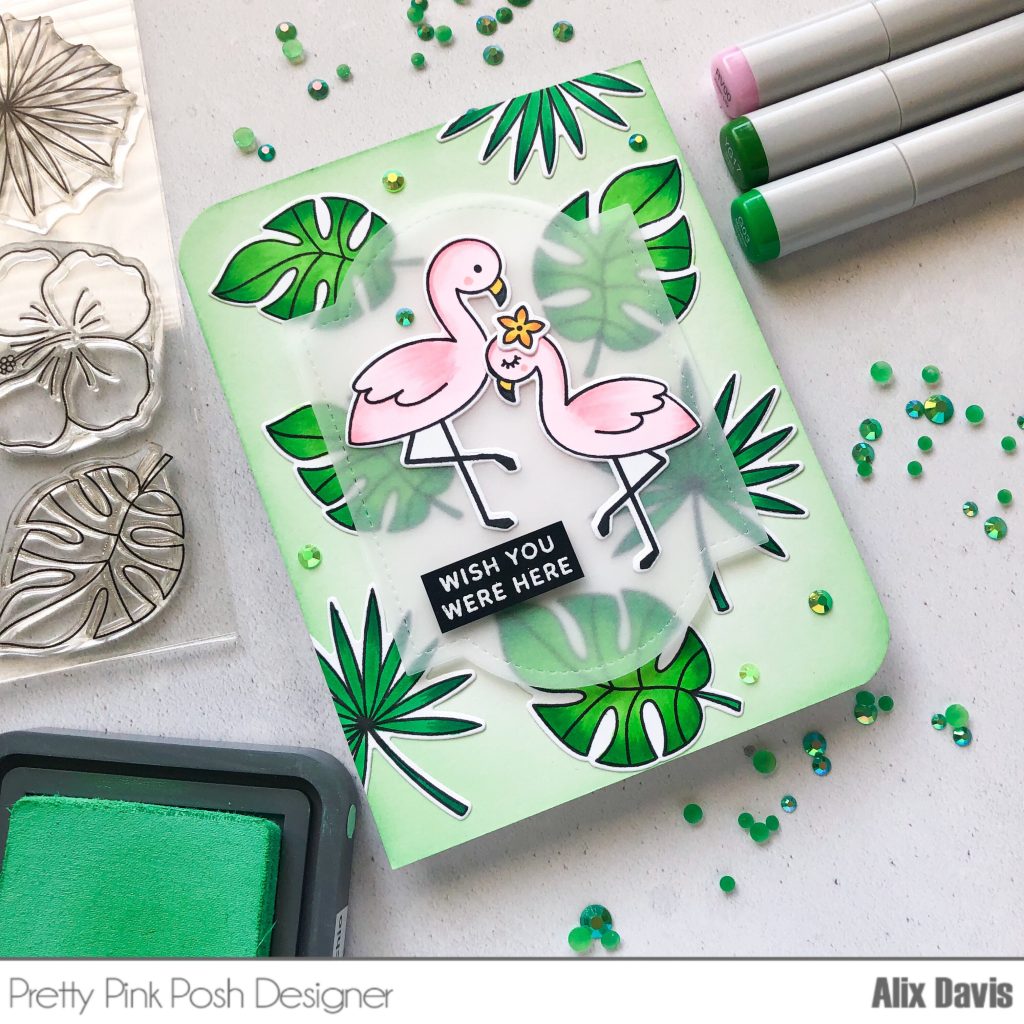
Pretty Pink Posh started to have stencil products. I masked my A2 sized watercolor paper using Wave Stencil and ink blended with Tim Holtz Distress oxide ink in  Squeezed Lemonade, Cracked Pistachio and Peacock Feather. Then I die cut the center of this inked background with Scallop Circles Die. I flipped the center negative cut out part over and ink blended it with Tim Holtz Distress oxide ink in Cracked Pistachio and Peacock Feather to create the scene background.

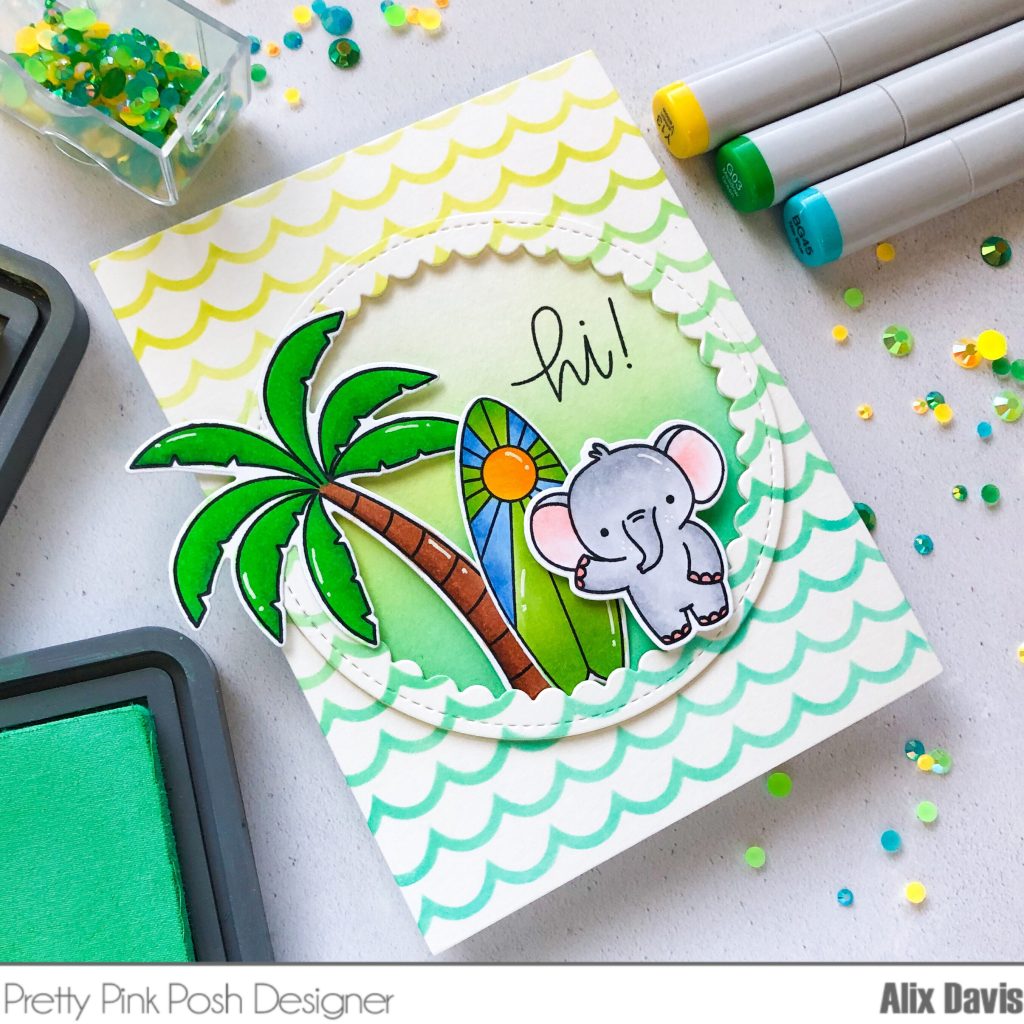
I added Foam stripes underneath the scalloped circle part to create better dimension. Then I attached my colored images within the circle background. At last, I stamped the sentiment “hi” from Everyday Greetings Stamp set.

<Card 3>

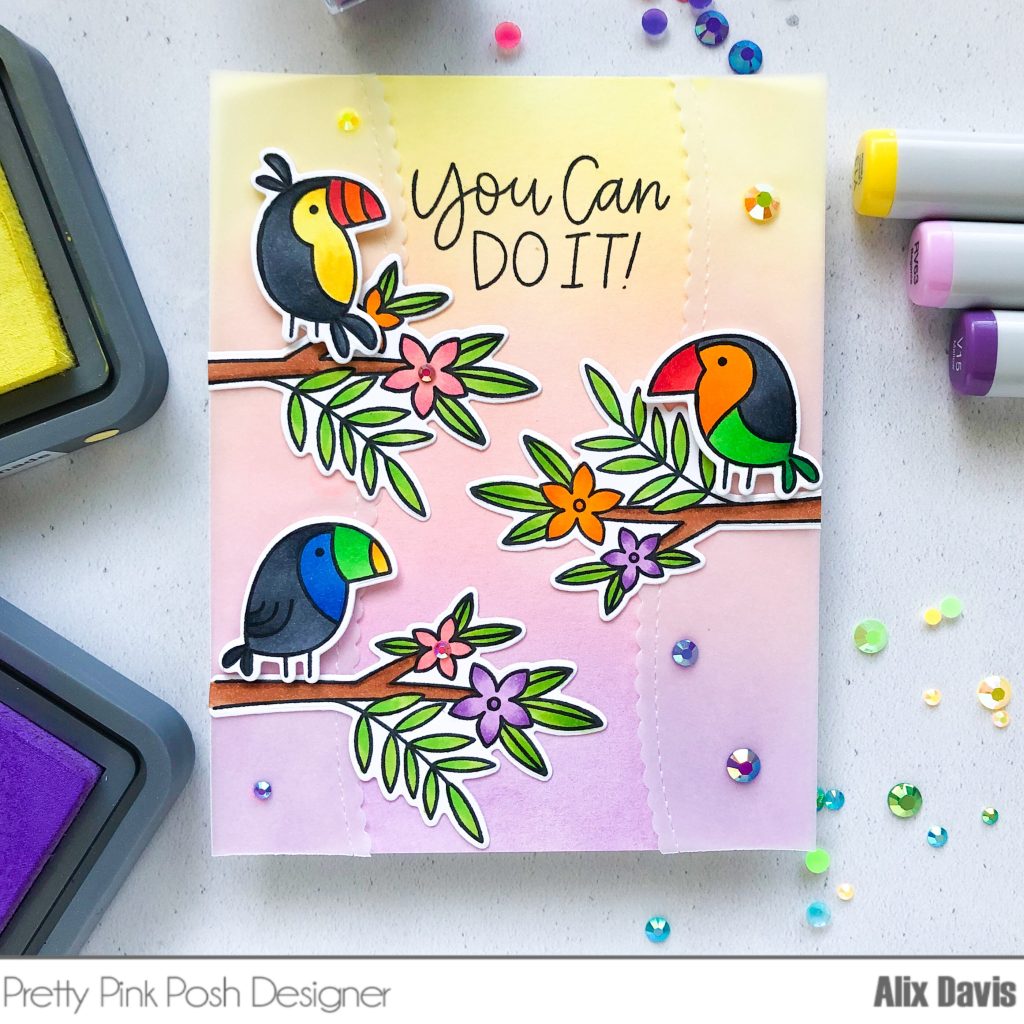
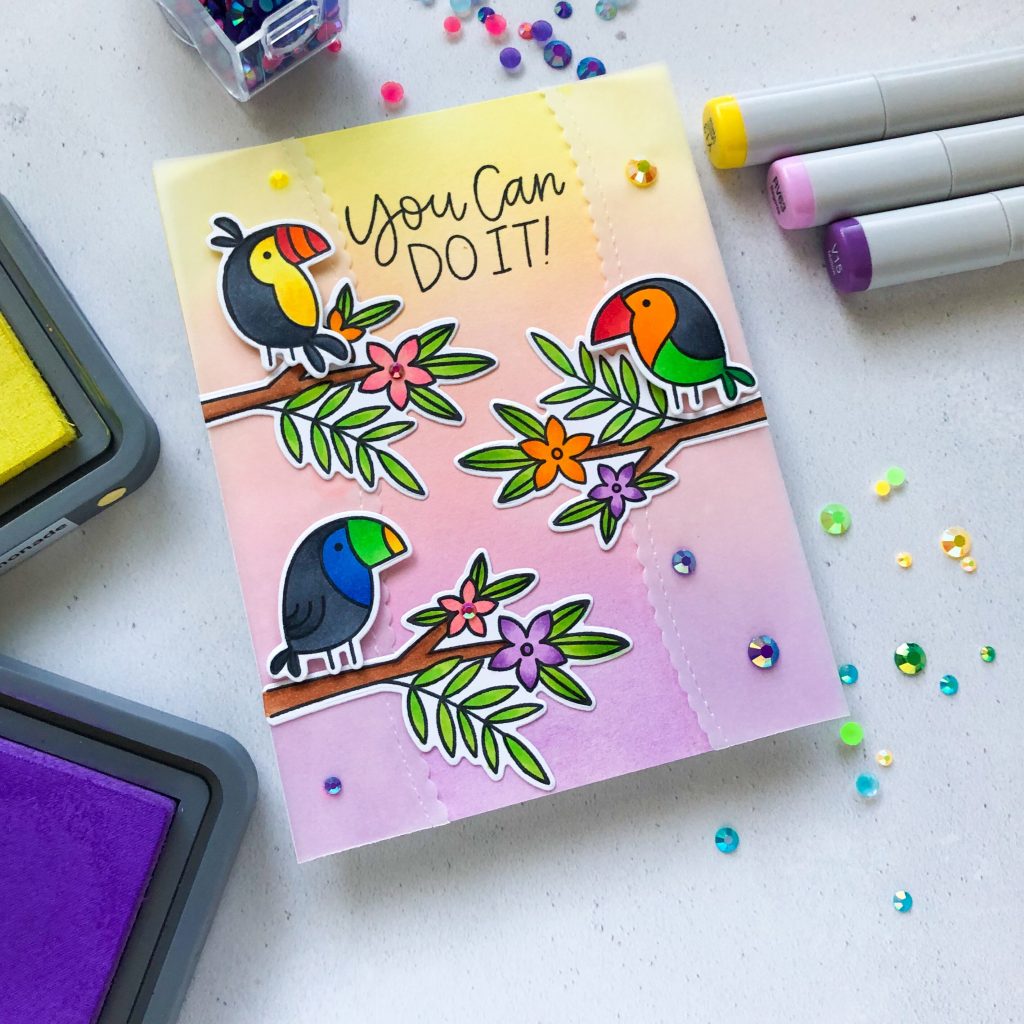
For my last card, I ink blended an A2 sized watercolor paper with Tim Holtz Distress oxide ink in Squeezed Lemonade, Worn Lipstick and Wilted Violet. Then I cut couple pieces vellum using Scallop Borders Die. I attached them to both side of my prepped background using Multi Medium Matte, Since the glue dries with matte finish, it is not very noticeable.

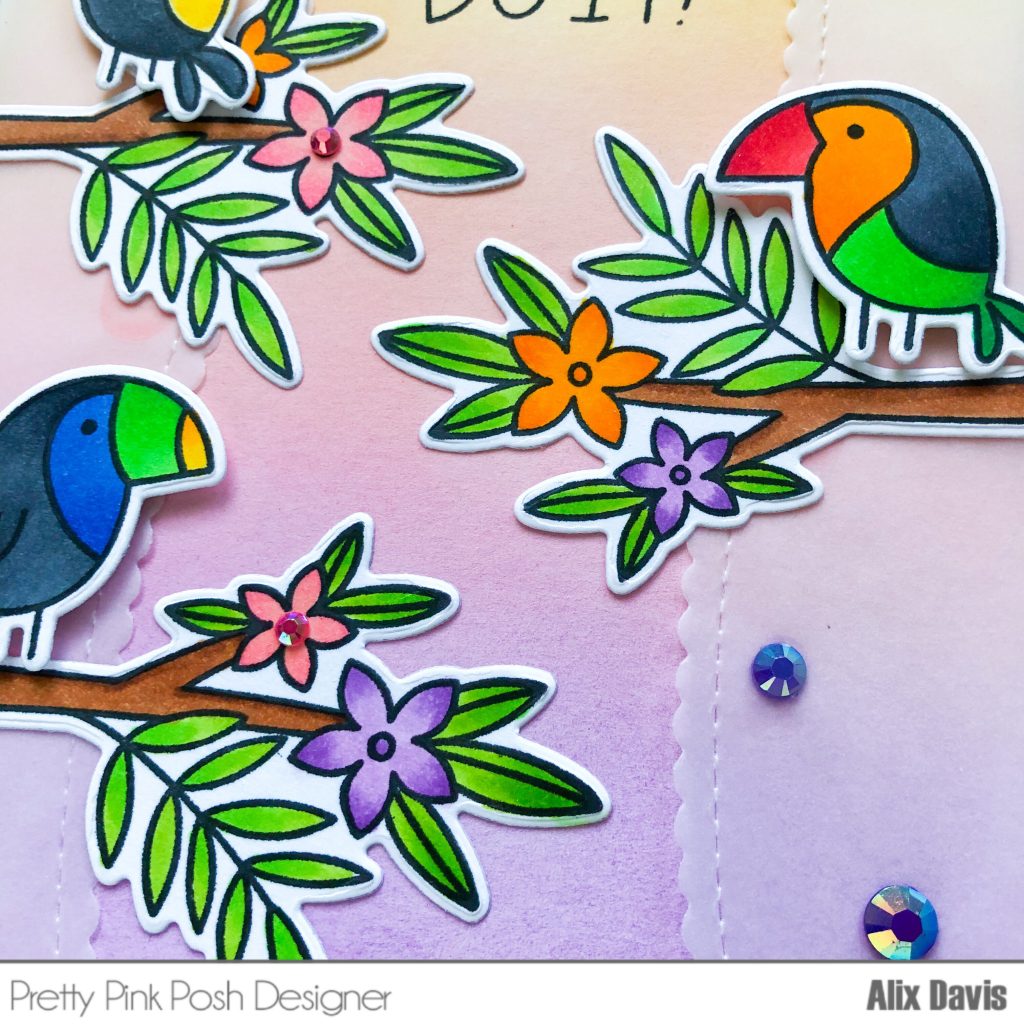
I stamped all images from Tropical Toucans Stamp set and cut out with the Coordinating Dies. Then I colored them with copic markers. I attached colored images onto the background using glue and Foam tapes.I stamped the sentiment “You Can Do It!” that comes in the same stamp set and embellished my card with Pansy Purple and Marigold Jewels.
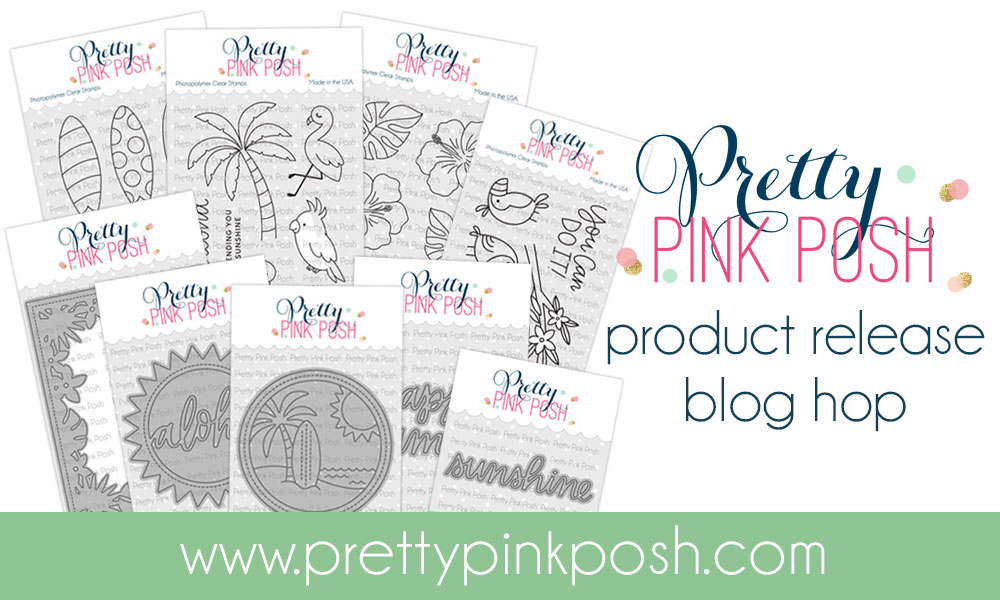
GIVEAWAY:

There are 4 $25 gift certificates up for grabs (two winners each day). Winners will be picked randomly along the blog hop. Comments must be left by 11:59 PM PST on 5/8/2019. Winners will be announced on the PPP blog.

NOW HOP WITH US!

Wish You Were Here-Pretty Pink Posh

Happy Monday!

Pretty Pink Posh June Product release is alive today! I made this card used a few new products from this release. Hopefully you could feel the tropical breeze from me.

To begin with, I stamped images from Hibiscus Flowers Stamp set and cut with Coordinating Dies, I also stamped stamped images from Tropical Birds Stamp set and cut with Coordinating Dies. Then I colored them with Copic Markers and set aside for later use.

I ink blended an A2 sized watercolor paper using Tim Holtz Distress oxide ink in Cracked Pistachio and rounded two of the corner with a craft corner punch. I glued a few colored leaf images onto the inked background and added a few green jewels from Luau Jewel Mix. I cut the center frame piece using Decorative Tag 2 Die out of vellum paper, then I added rest of colored images along with white embossed sentiment to finish my card.

To see more inspirations and win prizes, Please come back on June 12th for our blog hop! Ciao!

Waffle Flower 2019 June Release Blog Hop

Welcome to Waffle Flower June 2019 Product Release Blog Hop! Summer is finally here. I’ve been very busy planting my flowers and vegetable. How about you? Waffle Flower is bring you tons of blooming flowers for this month while having some cute and interesting stamp images. Let us take a look at a few cards I made with them

<Card 1>

For my first card, I stamped images from Iris You stamp set using memento tuxedo black ink on a piece of Neenah solar white 80 lbs cardstock paper and die cut with the matching dies. I color them with my copic markers and set aside for later use.

I ink blended my background using Tim Holtz distress oxide ink in Wilted violet and Seedless preserves onto a piece of A2 sized watercolor paper., then I splattered ink and white paint over the backgorund. Once its dry, I die cut the center with one of dies from A2 nesting rectangle 1 dies. I added the foam tape underneath the die cut negative piece to pop the center out of card base.

I attached my colored image to the center piece, then white embossed the sentiment onto black cardstock paper and die cut with the matching dies. At last I added enamel dots to finish my card.

<Card 2>

If you didn’t have enough of florals, here comes another floral stamp set.

The process of making this card is similar as last one.

I stamped images from Peony Notes stamp set using memento tuxedo black ink on a piece of Neenah solar white 80 lbs cardstock paper and die cut with the matching dies. I color them with my copic markers and set aside for later use.

I ink blended my background using Tim Holtz distress oxide ink in Worn lipstick on to a piece A2 sized watercolored watercolor paper., then I splattered ink  over the backgorund.

I attached my colored image to the center piece, then white embossed the sentiment onto black cardstock paper and die cut with the matching dies.That’s it for this card, easy and simple.

<Card 3>

We have another stop on our world tour with illustrator Kamo. Konnichiwa features cute people in traditional Japanese costumes with a ninja and sumo wrestler for fun.

I ink blended my background using Tim Holtz Distress oxide ink in Tumbled Glass and Aged Mahogany. I masked the lower portion of the card with washi tape, then heavily blended with Gathered Twigs to create the ground. I also splattered some water droplets and dried with a piece of paper towel to bring some interests.

I colored all images from Konnichiwa Stamp set with copic markers and die cut with the Matching dies. I managed to add most of images onto my card because it’s really hard to leave any of them behind. I stamped the sentiment and done with my card.

<Card 4>

Our popular mice, illustrated by Liz Mytinger are back this month dressed as pirates in P-arr-ty Time

To begin with this card, I masked an A2 sized watercolor paper using washi tape, then I ink blended the area around the masking tape using Tim Holtz Distrss oxide ink in Mustard seed to create ground for my critters to stand on.

Then I colored all images from P-arr-ty Time stamp set using copic markers and die cut them with the Matching Dies. I arranged them onto the prepped background to finish my card. when you have whole bunch of elements, it is just so easy to create your scene.

Now Hop with us!

Promotions:

  • To celebrate the blog hop, Waffle Flower is giving away $25 gift certificates to THREE lucky winners. You can leave a comment on my blog and along the hop by 11:59pm ET on 6/8/19 for your chances to win. Winners will be chosen at random from the comments left on any of the posts on this blog hop and will be announced on the Waffle Flower blog on  6/10/2019.

  • Receive a FREE pack of Stardust Enamel Dots with all orders $50 and over, while supplies last.

No code required; Limited 1 per customer; While supplies last; Valid through midnight 6/8/19

To Bee or Not to Bee Blog Hop

I am so excited to join To Bee or Not to Bee Blog Hop today to celebrate the 2nd World Bee Day and also to raise public awareness of the importance of bees and apicultural products. If you are interested in knowing more information. Please visit here http://www.worldbeeday.org/en/

For today’s card, I purposely chose this cute stamp set call Bee friends from Pretty Pink Posh. It is a pretty stamp set for this event.

To begin this card, I cut my card base into A2 size out of a piece of Bristol smooth paper. Then I ink blended the background with Tim Holtz Distress oxide ink in Tumbled Glass and Mustard Seed. I cut the scalloped frames using Pretty Pink Posh Scalloped frames die and adhered them to the center of the background using Foam Stripes.

I stamped all my images from Pretty Pink Posh Bee friends stamp set and die cut with the Coordinating Dies. Then I colored them using  Copic markers. After I arranged my colored images around the frames using Multi Medium Matte and Foam tapes, I stamped the sentiment “Thinking of you” from the same stamp set using Memento Tuxedo Black ink.

I hope you like my card. Just so you know, We have so many companies to sponsor this blog hop. Make sure to leave comments at all Blog Hop List below to get inspired and win prizes!!!!!!!!!

Giveaway:

Bugaboo Stamps, $12 Gift Certificate to the Store

Clearly Besotted Stamps, £15 Gift Certificate to the Store

Create a Smile, 50€ Gift Certificate to the Store

Gerda Steiner Designs, $15 Gift Certificate to the Store

Hannah Rosengren Studio, Bumble & Honey Bee Patch

Honey Bee Stamps, $30 Gift Certificate to the Store

Jane’s Doodles, $50 Gift Certificate to the Store

Kitty Bee Designs, 1 Digital Image of winner’s choice

Lawn Fawn, $25 Gift Certificate to the Store

Mo’s Digital Pencil, $5 Store Credit

Newton’s Nook Designs, $25 Gift Certificate to the Store

Paper Smooches, ’Bee Mine’ Stamp Set and ‘Bees’ Dies

Power Poppy, $20 Gift Certificate to the Store

Pretty Pink Posh, $25 Gift Certificate to the Store

STAMPlorations, $20 Gift Certificate to the Store

Sue Hastead of Tanglemouse Cards, Pretty Pink Posh ‘Bee Friends’ stamp set

Uniko, Clear Stamp Set (in stock) of winner’s choice

Your Next Stamp, ‘Honey Bee’ stamp set

Milka is also giving away Jane’s Doodles ‘Daisies’ stamp set to one lucky winner.

19 prizes will be given away to 19 winners.

Blog hop list:

  1. Milka Gubo
  2. Alexandra Suta
  3. Alice Huang
  4. Amy Tsuruta
  5. Donna Mikasa
  6. Kathy Curry
  7. Ksenija Rizova
  8. Larissa Walgemoed
  9. Neha Bhatt
  10. Nonni Niskanen
  11. Samantha Mann
  12. Sonja Kerkhoffs
  13. Tina Pavlovic
  14. Valentina Bizjak
  15. Gerda Steiner Designs (sponsor)
  16. Honey Bee Stamps (sponsor)
  17. Lawn Fawn (sponsor)
  18. Newton’s Nook Designs (sponsor)
  19. Paper Smooches (sponsor)
  20. Pretty Pink Posh (sponsor)
  21. Uniko (sponsor)
  22. Your Next Stamp (sponsor)

Milka Gubo (InLinkz – return after commenting and add your name to InLinkz)


Pinkfresh Studio May Essentials Release Blog Hop

Welcome to Pinkfresh Studio May Essentials Release Blog Hop! You will get chance to play with some of basic and unique cutting dies, and most exciting part for me is that Pinkfresh Studio added some Crystals and Jewels into the craft collections. Today I would like to show you couple cards featuring Pretty Frame 2 Die with those gorgeous embellishments!

<Card 1>


To make this card, I ink blended my background with Tim Holtz Distress oxide ink in Mustard Seed and Worn Lipstick onto a piece of A2 sized watercolor paper.  Once the surface is completely dried, I stamped the large sentiment “You”ve got this” from You’ve Got this! stamp set to the center of the background using Versafine Onyx black ink.


I used Pretty Frame 2 die to cut whole bunch shapes of frames out of Neenah Solar white 110 lbs cardstock paper and chose some a few to attach to the background using Multi Medium Matte and Foam tapes. I embellished my card with a few yellow jewels from Jewel Mix. So my first card is done.


<Card 2>

When I saw all color options from Crystal Mix, I decided to make this card colorful. I ink blended with Tim Holtz Distress oxide ink in squeezed Lemonade, Picked Raspberry, Twisted Citron and Salty Ocean onto a piece of A2 sized watercolor paper.

I used some of frames cut out from Pretty Frame 2 Die to create my shaker window frame. I poured some coordinating colors from Crystal Mix and sealed the window with Acetate paper and Foam tapes (I stacked Foam tapes twice to build higher clearance so all crystals could be in the window moving freely). At last, I added “smiles” Puffy stickers from Everyday Musings Puffy Accents to finish my card.


Now Hop with us !


You are invited to the Inlinkz link party!

Click here to enter


<!– end InLinkz code →

GIVEAWAYS:

  • Pinkfresh Studio will be giving away the full April Essentials release on the Pinkfresh blog, and on our IG feed.
  • I will be giving away a $25 gift card on my blog post too. the winners will be picked from the comments below.
  • The winners will be picked and posted on Monday, May 27th on our GIVEAWAY PAGE. You must check that page & claim their prize within 2 weeks.

SHOPPING PROMO:

  • A free die with purchase. There is no code necessary, and the die will automatically load into your cart.  
  • Free/discounted shipping from May 20-26th on orders $50+. You must use the code MAYESSFREESHIP50. Shipping is free in the USA, and $5.50 off for our International friends.

You did it! – Pretty Pink Posh 3 Days Sale

Hello everyone!

What day is it today? Thursday? It is Pretty Pink Posh 3 Days Sale!!! We are featuring School Friends Stamp set and Coordinating dies.  I brought in some of new stamp to work with the cute little boy which made a adorable graduation card below.

To begin with this card, I stamped selected images from  School Friends Stamp set and Congrats Grad Stamp set onto a piece of Neenah Solar white 80lbs card stock paper, and die cut with Coordinating Dies (School Friends / Congrats Grad) . Then I colored them with copic markers and set aside for later use.

Then I cut the window using Storybook 5 Die out of an A2 sized watercolor paper. I ink blended the negative cut out using Tim Holtz Distress oxide ink in Salty Ocean, and I also splattered the droplets of Salty Ocean with water.  I adhered the outer frame with foam tape to create dimension.

At least, I adhered all images, stamped the sentiment “You did it!” and added Jewels in Spring Green to finish my card. Now it’s your time to grab this combo for  25% off!


This entry was posted in Cards.

Waffle Flower 2019 May Release Blog Hop + Giveaway

Welcome to Waffle Flower May 2019 Product Release Blog Hop! I am super duper excited to be here hopping with you. This new release is filled with many fun stamps and dies which I am sure you will love!

<Card 1>

For my first card, I stamped the images from Wild Rose Stamp set and cut with the Matching dies. Then I colored the selected images with Copic markers.

I ink blended onto a piece of A2 sized watercolor paper using Tim Holtz Oxide ink in Salty Ocean and Tea Dye. Then I splattered water drops over the background and dried with paper towel.

I stamped the sentiment “happy birthday” that comes with  Bouquet Builder stamp set onto a piece of black cardstock paper using Versamark and heat embossed with white embossing powder. I arranged the image and sentiment onto lower portion of card and added some enamel dots from Waffle flower enamel dots in Stardust  to finish my first card.

<Card 2>

The new series with illustrator Kamo that features different cities around the world!  Our first stop is London – Oyez will sure to help you send some love to those who hold this amazing city close to their heart.

I wanted to create a bright color scene, so chose blue and yellow combo. To begin with, I stamped the images from OYEZ Stamp set and die cut with the Matching Dies. Then I colored the selected images with  Copic markers.

I cut two pieces of card bases. One was in A2 sized card stock paper in yellow and another one was slightly smaller than A2 size watercolor paper. I ink blended watercolor paper with Tim Holtz Distress oxide ink in Salty Ocean and Black soot, then I overlapped it over the yellow card stock paper. After I attached colored images, I stamped the sentiment and water droplets to finish this card.

<Card 3>

For my last card, let us get back my favorite pastel colors to create a warm moment.

I stamped images from Wedding Day Stamp set and die cut with the Matching Dies.Then I colored the selected images with Copic markers.

I ink blended my background onto a piece of A2 sized Bristol smooth paper with Tim Holtz Distress oxide ink in Picked Raspberry and Cracked Pistachio. Then I splattered water and ink mixture over the background to bring some interests.

I attached my colored images onto the background and stamped the sentiment to lower right corner of the card. Enjoy this blog hopping with all talented card designers and good luck!

HOP WITH US!

 Waffle Flower

  Anna Szczepanska 

Promotions:

  • To celebrate the blog hop, Waffle Flower is giving away $25 gift certificates to THREE lucky winners. You can leave a comment on my blog and along the hop by 11:59pm ET on 5/8/19 for your chances to win. Winners will be chosen at random from the comments left on any of the posts on this blog hop and will be announced on the Waffle Flower blog on 5/9/2019.

  • Receive a FREE Tiny Wings Die with all orders, while supplies last.

         No code required; Limited 1 per customer; While supplies last; Valid through midnight 5/8/19

Pretty Pink Posh April 2019 Product Release Blog Hop

Good morning!

Welcome to Second Day of Pretty Pink Posh’s April Release Blog Hop! I am not sure if you explore all new goodies that Pretty Pink Posh brought to you this month. The floral stamp is breathtaking, the critter stamps are as cute as you wished, and lots of accessory stamps, dies and stencils to help you build your perfect cards.Today I would like to show you couple cards that I made with products wowed me for the first sight.

<Card 1>

Let’s start with this gorgeous Peony Stamp set. Shall we?! To begin with, I stamped the images from Peonies Stamp set using Memento Tuxedo Black ink over a piece of Neenah Solar white 80lbs card stock paper and die cut with the Coordinating Dies. Then I colored them with copic markers and set aside for later use.

I grabbed Wide Stripes stencil and laid over an A2 sized watercolor paper, then I ink blended over the stencil using Tim Holtz Distress oxide ink in Tumbled Glass and Salty Ocean. I also splattered some salty ocean water mixture over the background to bring some interests. I cut the scallop shaped frame using Scallop frames Die and place it in the middle of my background with foam tapes.

I arranged my colored images in the frame I created using Multi Medium Matte and Foam tapes. Then I heat white embossed “Get well soon” sentiment that is from Animal Signs Stamp set over black card stock paper and cut it into stripe to attach onto my card. I added Clear droplets around my centerpiece to finish my card.

<Card 2>

Mother’s day is approaching. Did you get your present and card ready?! How about some inspiration here! To begin with this card, I ink blended two pieces of A2 sized watercolor paper using Tim Holtz Distress oxide ink in Tea Dye and Twisted Citron. I die cut one with Pretty Pink Posh Lattice Background Die and lay it over the other one with Foam tapes to create dimensions.

I die cut my sentiment out of Mother’s Day Script Die and ink blended them with Tim Holtz Distress oxide ink in Worn Lipstick. I attached it to the upper portion of my panel. I then stamped the images form Elephant Friends and Mother’s day Stamp set and die cut with their Coordinating Dies (Elephant Friends/Mother’s Day) I copic colored them and arranged them onto my prepared panel.

I added Fairytale Fuchsia sequins around my sentiments and images as embellishment. My card is done!

Thanks for stopping by. I hope you enjoy it! Now let’s see how you could participate this Blog hop.

GIVEAWAY:

There are 4 $25 gift certificates up for grabs (two winners each day). Winners will be picked randomly along the blog hop. Comments must be left by 11:59 PM PST on 5/8/2019. Winners will be announced on the PPP blog.

HOP WITH US!

You’re A Star – Pretty Pink Posh

Hello Friends!

I hope you all had good dose of Pretty Pink Posh April Release reveal yesterday. Raise hands if you already jumped on some of these products. Before our Release blog hop hits in a few days, I want to show you a shaker card I quickly made over the weekend.

First of all, I stamped my images from Elephant Friends stamp set and Mother’s day stamp set onto a piece of Neenah Solar white 80lbs card stock paper using memento tuexdo black ink and die cut them with coordinating dies. (Elephant Friends / Mother’s day) Then I colored them with copic markers and set aside for later.

I created background simply using Tim Holtz distress oxide in Tumbled Glass and Cracked Pistachio with ink blending technique. I splattered water over the ink background and removed droplets with a piece of paper towel. Then I cut windows using Pretty Pink Posh Stitched Pieces die. I stamped the sentiment “You’re a Star” onto one of those negative cut out.

I added a piece of acetate paper underneath the window opening and used foam tape to pop the dimension so I could create the shaker windows. To fill in the shaker windows,  I added Pretty Pink Posh 1/4″ Iridescent Star Confetti and Iridescent Mini Star confetti.I assembled all colored images onto the background using Multi Medium Matte and Foam tape.  Just like that, I finished my card.

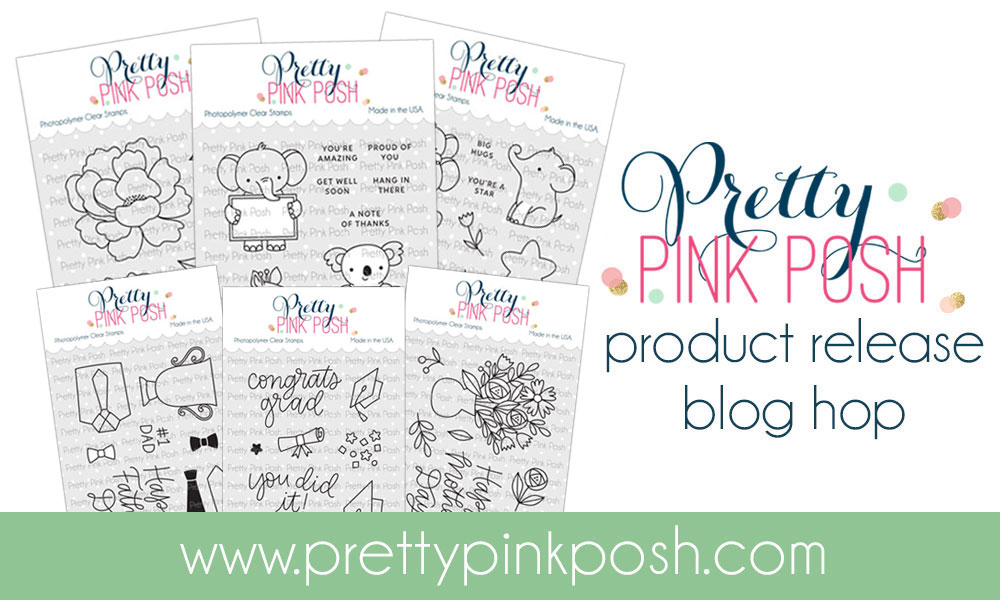
 Be sure to come back to participate 2 days long Pretty Pink Posh April Release Blog Hop. I will be seeing you on the second day of blog hop which is May 2nd. Ciao!

Pinkfresh Studio April Stamps and Dies Release Blog Hop

Welcome to Pinkfresh Studio April 2019 Stamps and Dies Release Blog Hop! This large release will wow you like no tomorrow. I am so proud to say that we have a few team members designed the products for this release. I am not that creative but I am very happy for them! Today I am here introducing an elegant fun die named Lacy Floral Border to you.

<Card 1>

For my first card, I decided to go for elegant and classic. When you have a beautiful die like this, you really don’t need to do too much to get a good result.

I ink blended my ground using Tim Holtz Distress oxide ink in Shaded Lilac and Faded Jeans onto a piece of A2 sized watercolor paper.  Then I mixed these two colors with water and splattered over the background to create the cool effect.

I stamped the sentiment “Beautiful”from You’ve Got this Stamp set to the center of the card using VersaMark embossing ink and heat embossed with gold embossing powder.  I die cut my beautiful borders using Lacy Floral Border Die out of Neenah Solar white 100 lbs card stock paper and attached them onto the background with foam tapes to create dimensions.

A last, I added some Jewels ( Not yet released products ) to embellish my card.

<Card 2>

Since it is Spring finally, I went for bright pink and green to create my second card.

The background prep is similar to my last card. I ink blended my ground using Tim Holtz Distress oxide ink in Worn Lipstick and Picked Raspberry.

I wanted to create”Wishing you a Beautiful day” collage. so I stamped “Wishing” and ” Beautiful” from You’ve Got this Stamp set to the center of the card using Versafine Oynx Black ink. I also white embossed “you a” and “day” on black card stock paper and cut into rectangle strips to fit into the blank space I saved.

I cut two borders using Lacy Floral Border Die out of Neenah Solar white 100 lbs card stock paper and then ink blended with Tim Holtz Distress oxide in Twisted Citron and  Cracked Pistachio lightly. I directly glued them to the top and bottom of my card and embellished with some jewels ( Coming up soon!)

Now Hop with us to be inspired by many of us!

You are invited to the Inlinkz link party!

Click here to enter


GIVEAWAYS:

  • Pinkfresh Studio will be giving away the full April Essentials release on the Pinkfresh blog, and on our IG feed.
  • I will be giving away a $25 gift card on my blog post too. the winners will be picked from the comments below.
  • The winners will be picked and posted on Monday, May 6th on our GIVEAWAY PAGE. You must check that page & claim their prize within 2 weeks.

SHOPPING PROMO:

  • Free House die with any purchase. There is no code necessary, and the die will automatically load into your cart.

  • Pinkfresh will also be offering free/discounted shipping from April 29th -May, 5th on orders $50+. You must use the code APRESSFREESHIP50. Shipping is free in the USA, and $5.50 off for our International friends.